
The best transfer boards are the ones that match the user’s weight, transfer distance, wheelchair setup, and ability to control their trunk—not simply the longest or cheapest board.
For most seated transfers between a wheelchair and a bed, a rigid, smooth-top board around 24–30 inches long, rated well above the user’s body weight, with tapered edges and at least one handhold is a practical starting point. Users with limited upper-body strength may benefit more from a low-friction board or a sliding-disc transfer system than from a basic wooden board.
As an Amazon Associate we earn from qualifying purchases at no extra cost to you.


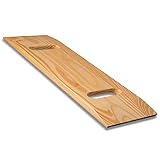
Top 3 picks at a glance
What to compare before buying
1. Weight capacity and safety margin
Check the manufacturer’s stated working load, then leave a margin for clothing, shoes, movement, and uneven loading. A person weighing 220 pounds should not automatically use a board rated for 225 pounds. A capacity of at least 300 pounds gives a more useful margin, while bariatric users may need a board rated at 400–600 pounds or more.
Capacity is not the only structural issue. A board can be technically strong enough yet unsafe if it flexes excessively, rests on only a few inches of the wheelchair seat, or is loaded near its rounded end. Look for a design that remains supported at both ends during the entire transfer. A caregiver should confirm the rating and setup with an occupational or physical therapist when the user has poor balance, involuntary movement, or a significant weight difference from the caregiver.
2. Length: bridge the gap without creating a lever
Measure the actual gap between the wheelchair seat and the destination surface. Do not measure only from cushion edge to bed edge: include the wheelchair frame, armrest position, mattress compression, and any gap created by a bedside rail.
A board that is too short may not overlap both surfaces enough. One that is unnecessarily long can increase the distance the user must slide and can become harder to position in a confined room. As a practical guide:
| Transfer situation | Typical useful board length | What to verify |
|---|---|---|
| Wheelchair to nearby bed with minimal gap | 24–27 inches | At least several inches of support on both surfaces |
| Wheelchair to toilet or commode | 27–30 inches | Armrest clearance and stable toilet-side contact |
| Wider gap or lower bed | 30–34 inches | Whether the board bends, flexes, or obstructs the wheels |
| Large user or bariatric chair | 30–36 inches or a bariatric model | Width, load rating, and full support under the user |
These are starting ranges rather than universal prescriptions. A therapist should assess the setup if the transfer is difficult or the surfaces are at different heights.
3. Surface friction: sliding control versus effort
A completely smooth surface reduces drag, but it can also make the user slide too quickly if they cannot control their hands or trunk. A lightly textured or coated surface provides more braking but requires more effort. The best balance depends on the person’s strength and whether the transfer is a lift-and-pivot, a short slide, or a repeated lateral transfer.
- Low-friction top: useful when the user has limited arm strength and can maintain a stable sitting position.
- Higher-friction top: preferable when extra sliding control is needed, provided clothing does not catch or bunch.
- Sliding-disc design: can reduce skin shear and effort by allowing a disc or seat to move along the board, but it adds parts, cleaning requirements, and positioning steps.
- Bottom surface: should resist shifting against the wheelchair cushion or mattress. A slippery top with a slippery bottom is a poor combination.
Never apply household oils, wax, or makeshift lubricant to a board. They can damage the surface, transfer to upholstery, and make the board unpredictable.
4. Handles and hand placement
Handles are useful when they allow the board to be carried and positioned without placing fingers beneath a loaded edge. Cutout handles can also help a caregiver retrieve the board after a transfer. However, large openings may weaken a narrow board or encourage the user to grip a location that is not intended for weight-bearing.
Look for rounded handle edges, enough clearance for gloved hands, and a grip that remains accessible when the board is partly beneath the user. A person with weak hand function may need a board with fewer exposed openings and a therapist-taught hand position rather than a handle-heavy design.
5. Edge design and skin protection
Tapered, beveled ends are easier to place beneath the thigh and reduce the chance of catching clothing or digging into the skin. Rounded corners are safer around the hips and wheelchair frame. Avoid sharp edges, exposed fasteners, cracks, and boards that have warped from heat or moisture.
A board should never be dragged across bare skin during a transfer. Smooth edges help, but proper clothing, positioning, and a transfer technique that limits shear are still essential. Stop if the user reports pinching, burning, or skin pain.
Best transfer board type for each situation
| User situation | Most suitable design | Why | Potential drawback |
|---|---|---|---|
| Independent user with good trunk control | Rigid, lightweight board with beveled ends | Simple to position and carry | Requires adequate arm and balance strength |
| Limited upper-body strength | Low-friction board or sliding-disc system | Reduces pushing effort | Needs careful speed and positioning control |
| Frequent wheelchair-to-bed transfers | Durable coated board with carrying handle | Easy to clean and repeatedly reposition | May be heavier than basic wood or plastic |
| Bariatric user | Wide bariatric board rated substantially above body weight | Improves stability and load margin | May not fit between wheelchair armrests |
| Very limited balance or weight-bearing | Professional assessment; possibly a powered or mechanical lift | Board transfers may not provide enough control | Higher cost and more equipment space |
Wheelchair and bed compatibility checklist
- Remove or swing away the armrest: A fixed armrest can stop the board from resting flat or force it against the user’s hip.
- Move the footrests aside: The user needs room to place both feet or follow the prescribed technique.
- Lock the brakes: Test the chair before loading the board. Wheel locks are not a substitute for a level, stable floor.
- Check height difference: A modest height difference may be manageable, but a high bed can make the user slide downhill or uphill with excessive effort.
- Inspect mattress softness: A very soft mattress can swallow the far end of the board and reduce support.
- Measure the opening: Confirm that the board fits between armrests, bed rails, commode arms, and nearby furniture.
A safer setup in six steps
- Position the wheelchair as close to the destination as possible, usually at a slight angle rather than directly parallel.
- Lock the wheels and remove obstructions such as footrests or a detachable armrest.
- Place the board under the user’s thigh or buttock according to the instructions and therapist’s technique. It must rest securely on both surfaces.
- Keep the user’s feet supported and encourage a forward lean if that is part of the prescribed method.
- Use small, controlled movements. Do not pull on the user’s arms or lift under the armpits.
- Remove the board only after the user is stable on the destination surface, then inspect the skin for redness or pinching.
For example, if a wheelchair seat is 20 inches from the bed edge, a 24-inch board may leave only a short overlap once cushions and frame clearance are considered. A 30-inch board can provide more usable support, but only if it fits between the armrest and bed and does not obstruct the wheels. This is why measured overlap matters more than the headline length.
Portability, cleaning, and storage
For travel, prioritize a board that is light enough for the user or caregiver to position safely, has a built-in handle, and fits inside the vehicle without bending. Folding boards are convenient but introduce hinges and joints that must be inspected for looseness. A rigid board is often simpler and easier to clean.
Use the manufacturer’s approved disinfectant and drying method. Inspect before every transfer for cracks, splinters, delamination, sharp edges, damaged coating, or a distorted shape. Replace a board when its surface becomes unpredictable or its structure has been compromised; tape and household repairs are not reliable load-bearing fixes.
Frequently asked questions
When should a transfer board not be used?
A transfer board may not provide enough control for someone with very limited balance or weight-bearing ability. The article recommends professional assessment in that situation, possibly involving a powered or mechanical lift. A therapist should also assess transfers that are difficult or involve poor balance, involuntary movement, or a significant weight difference between the user and caregiver.
Can a transfer board be placed directly on bare skin?
No, a transfer board should never be dragged across bare skin. Proper clothing, positioning, and a technique that limits shear remain important even when the board has smooth edges. Stop the transfer if the user reports pinching, burning, or skin pain, and inspect the skin for redness or pinching after the user is stable.
How can I tell whether a transfer board is damaged?
Inspect the board before every transfer for cracks, splinters, delamination, sharp edges, warping, exposed fasteners, or other damage. Folding boards also require inspection for loose hinges and joints. Avoid using a board that has warped from heat or moisture, because its condition may affect safe positioning and support during the transfer.
What should I do if the wheelchair armrest cannot move?
A fixed armrest can stop the board from resting flat or force it against the user’s hip. Check whether the board fits between the armrests and still rests securely on both surfaces. If it does not, the setup may be incompatible; a therapist should assess difficult transfers rather than having the user or caregiver force the board into position.
How should a transfer board be cleaned after use?
Clean the board using the manufacturer’s approved disinfectant and drying method. A rigid board is often simpler to clean, while a sliding-disc design adds cleaning requirements and positioning steps. Before storing it, inspect the board for damage and ensure it is dry. Folding models should also be checked for looseness at their hinges and joints.
Bottom line
Choose the best transfer board by matching the rated capacity and usable length first, then fine-tune the decision using friction, edge shape, handles, portability, and compatibility with the wheelchair and bed. If the user cannot sit upright, follow instructions, or control their movement, a transfer board may be the wrong tool; a qualified occupational or physical therapist can recommend a safer method and verify the equipment setup.


