
Top 3 picks at a glance
Best Camera Cleaning Kits for Safe Sensor and Lens Care
The best camera cleaning kits combine a manual air blower, sensor-safe swabs matched to your sensor size, high-purity cleaning fluid, and separate lens tools; for most DSLR and mirrorless owners, a kit built around a blower, dry brush, microfiber cloths, and individually sized wet swabs is the safest choice.
A large bundle is not automatically better. Cheap cotton buds, household glass cleaner, unsealed brushes, and oversized swabs can leave fibers, spread oil, or damage coatings. The right kit depends on whether you are removing loose dust from a lens, cleaning fingerprints from a filter, or dealing with a mark on the low-pass or protective filter above the image sensor.
As an Amazon Associate we earn from qualifying purchases at no extra cost to you.



What to look for in the best camera cleaning kits
1. A manual blower with a one-way valve
A rubber air blower should be the first tool used on almost every camera-cleaning job. Look for a large bulb that produces a strong pulse of air and an intake valve that draws air in from behind the nozzle rather than through its tip. A removable nozzle is useful for storage, but it should fit tightly.
Do not use compressed-air cans. Their propellant can eject liquid, create condensation, or drive dust deeper into the camera. An electric air duster can also be too forceful around a shutter, mirror, or sensor assembly. A manual blower gives you control and produces no residue.
2. Sensor swabs that match the sensor size
Sensor swabs are not universal. Full-frame sensors generally require a 24 mm swab, APS-C sensors commonly use a 16 mm swab, and Micro Four Thirds sensors commonly use a 12 mm swab. Some manufacturers use slightly different naming, so check the swab maker’s compatibility chart before buying.
A swab should be individually sealed, lint-free, and designed for one-time use. Never reuse a swab after it has touched the sensor. A used swab can carry abrasive particles across the surface on its second pass.
3. Fluid with a clear optical-cleaning specification
Sensor-cleaning fluid should be intended for camera sensors or precision optical surfaces, should evaporate without an oily film, and should be supplied in a sealed bottle. Avoid kits that merely label a liquid “professional” without identifying its intended use.
Lens-cleaning fluid and sensor-cleaning fluid are not necessarily interchangeable. A lens solution may be safe for glass coatings but unsuitable for a sensor assembly, while a sensor fluid may be unnecessarily expensive for routine lens cleaning. If a kit includes one bottle for both jobs, follow its manufacturer instructions and use only a minimal amount.
4. Separate tools for lenses and sensors
A practical kit has a lens pen or soft lens brush for dry surface dust, optical-grade microfiber cloths, lens tissues, and sensor swabs kept in separate packaging. This separation matters: a cloth that wiped sunscreen from a lens barrel should never go near a sensor.
Best camera cleaning kits by use case
| Situation | Recommended kit specification | Why it fits | Typical market range |
|---|---|---|---|
| Basic lens and body maintenance | Manual blower, retractable lens brush or lens pen, microfiber cloths, lens tissues | Handles fingerprints, loose dust, and minor smudges without opening the camera | Usually $15–$30 |
| Frequent lens changes outdoors | Large blower, sealed sensor swabs, sensor fluid, lens pen, dust-resistant pouch | Adds sensor-care tools for dust introduced during frequent changes | Usually $30–$70 |
| Full-frame DSLR or mirrorless camera | 24 mm sensor swabs, sensor-safe fluid, blower, separate lens cloths | Uses the correct swab width and avoids repeated passes | Usually $35–$80 |
| APS-C or Micro Four Thirds camera | 16 mm or 12 mm swabs respectively, plus blower and optical cloths | Prevents an incorrectly sized swab from contacting the frame or missing the sensor edges | Usually $30–$75 |
| Travel or event kit | Compact blower, lens pen, two clean cloths, pre-sealed swabs, small fluid bottle | Reduces weight while preserving emergency cleaning capability | Usually $20–$55 |
Recommended products and product families
Giottos Rocket Air Blower
The Giottos Rocket Air Blower is a sensible foundation for a camera kit because its bulb design is easy to control and it is available in different sizes. Choose a larger version if you regularly clean a DSLR or full-frame mirrorless camera; the extra air volume means fewer squeezes. Keep the nozzle pointed downward or away from the camera while taking in air, then direct short bursts across the surface rather than pressing the tip close to it.
LensPen LensPen
The LensPen system is designed for dry lens cleaning and typically combines a retractable brush with a cleaning tip. It is useful for fingerprints and small smears on a front element or protective filter. It should not be used on a visibly gritty surface before blowing away loose particles, and its tip must remain clean and capped between uses.
VisibleDust sensor-cleaning systems
VisibleDust offers sensor brushes, swabs, fluids, and accessories in sizes intended for different sensor formats. Its product range is useful when you want to build a kit around a specific full-frame, APS-C, or Micro Four Thirds camera rather than accept a generic assortment. Confirm the exact swab and fluid combination for your camera before purchase.
Altura Photo camera cleaning kits
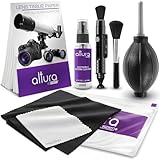
Altura Photo sells broad camera-cleaning bundles that commonly include a blower, brush, microfiber cloths, cotton swabs, cleaning fluid, and sensor-cleaning accessories. These can be good starter kits when the included sensor swabs are correctly sized. Inspect the contents carefully: a bundle is worthwhile for its optical tools, but replace any questionable cotton buds or unlabeled fluid with purpose-made alternatives.
How to clean a camera safely
Step 1: Identify the mark before touching anything
For a lens, photograph a plain bright surface at a narrow aperture such as f/16 or f/22 and inspect the image at 100 percent. A sensor dust spot usually stays in the same image position while changing lenses. A lens or filter mark may appear softer, change with focus, or disappear when the lens is replaced.
Step 2: Start with the least aggressive method
Turn off the camera, remove the lens, and hold the camera mount facing downward. Use five to ten short blower bursts without touching the sensor, mirror, or shutter. For a lens, blow first, then use a clean lens brush if needed. This order matters because wiping loose grit can create fine scratches.
Step 3: Use dry cleaning only when appropriate
A dry sensor brush can remove loose particles, but it should be specifically designed for sensors and free of visible contamination. Do not use a lens pen, makeup brush, or household paintbrush on the sensor. If dust remains after two careful blower attempts, wet cleaning is usually more predictable.
Step 4: Wet-clean with one correctly sized swab
Activate the camera’s sensor-cleaning mode or follow the manufacturer’s procedure for exposing the sensor. Apply only the amount of fluid specified by the swab maker—typically one or two small drops, not a saturated blade. Make one slow pass in a single direction, turn the swab, and make one return pass. Discard it immediately.
Allow the fluid to evaporate before replacing the lens. Take another test photograph at f/16. If a mark remains in exactly the same position, use a new swab rather than pressing harder. Repeated wet cleaning with a contaminated swab is more likely to spread residue than solve it.
DSLR versus mirrorless compatibility
| Camera type | Cleaning consideration | Safe approach |
|---|---|---|
| DSLR | The mirror and shutter mechanism can obstruct access and are mechanically delicate | Use the camera’s sensor-cleaning or mirror-lock procedure; never touch the mirror with a sensor swab |
| Mirrorless | The sensor is often exposed immediately after lens removal | Keep the mount facing down and use the manufacturer’s cleaning mode or service position |
| Full-frame | Larger sensor area requires wider swabs | Use swabs specified for approximately 24 mm sensors |
| APS-C | Crop-format dimensions vary slightly between brands | Use the swab maker’s APS-C compatibility list, commonly around 16 mm |
| Micro Four Thirds | Smaller sensor requires a narrower cleaning blade | Use a Micro Four Thirds-sized swab, commonly around 12 mm |
What should not be in a camera cleaning kit
- Compressed-air cans or liquid propellant dusters
- Unlabeled cleaning fluid with no optical-use instructions
- Loose cotton buds that shed fibers
- Abrasive paper towels or household tissues
- One cloth shared between the sensor, lens, camera body, and tripod
- Oversized sensor swabs that can contact the surrounding frame
Frequently asked questions
Can I use the same cleaning cloth for my lens and sensor?
No, lens and sensor tools should be kept separate. A cloth used on a lens barrel, especially after contact with sunscreen or other residue, should never go near the sensor. Use optical-grade microfiber cloths or lens tissues for lenses, and individually sealed, lint-free sensor swabs designed for the correct sensor size for sensor cleaning.
How can I tell whether a spot is on the lens or sensor?
A sensor dust spot usually stays in the same image position while changing lenses. A lens or filter mark may appear softer, change with focus, or disappear when the lens is replaced. You can photograph a plain bright surface at a narrow aperture such as f/16 or f/22, then inspect the image at 100 percent.
How much sensor-cleaning fluid should I put on a swab?
Use only the amount specified by the swab maker, typically one or two small drops rather than a saturated blade. Apply the fluid to one correctly sized swab, make one slow pass in a single direction, turn the swab, and make one return pass. Discard the swab immediately after use.
Can I reuse a sensor swab if it still looks clean?
No, a sensor swab should be used only once. After touching the sensor, it may carry abrasive particles across the surface during a second pass, even if contamination is not visible. If a mark remains in exactly the same position after cleaning, use a new swab instead of pressing harder.
Is a lens pen safe to use on a dusty lens?
A lens pen should not be used on a visibly gritty surface before loose particles are removed. Blow across the lens first, then use a clean lens brush or the lens pen for fingerprints and small smears. Keep the pen’s tip clean and capped between uses, and do not use a lens pen on the sensor.
Final buying recommendation
For most photographers, the best camera cleaning kits are not the largest bundles. Choose a kit with a reliable manual blower, a dedicated lens pen or soft brush, two or more clean microfiber cloths, and sealed sensor swabs matched to your exact sensor format. Add a reputable sensor fluid only if you are prepared to follow the wet-cleaning procedure carefully.
If portability is the priority, carry a blower, lens pen, one sealed cloth, and correctly sized swabs in a small pouch. If you change lenses in dusty environments, spend more on the blower and keep spare sealed swabs available. When a sensor remains marked after careful cleaning, stop escalating the pressure and use a professional camera service; a cleaning kit is intended to remove contamination, not repair damaged coatings or components.


