Memory latency is one of those specs most PC gamers ignore until they see a stutter pattern no GPU upgrade fixes. On Windows, the time it takes the CPU to fetch data from RAM is influenced by more than the memory chips themselves: power plans, background services, virtualization overhead, and BIOS defaults all add nanoseconds that stack up in frame-time consistency. The good news is that a meaningful chunk of that overhead is recoverable in software. Realistic expectations matter, though: no Windows tweak will transform a system the way going from single-channel to dual-channel memory does — often the single biggest latency win available. Software-side changes typically buy smoother frame pacing and a few percentage points of CPU-bound performance, not a leap in average FPS. If you are CPU-limited at 1080p with a high refresh monitor, that smoothness is exactly what you will feel. If you are GPU-limited at 4K, most of this guide will barely register. Know which camp you’re in before you start.
Quick Wins
These are the changes with the best return on effort. The expected gains below are qualitative because results vary enormously by CPU, memory kit, and workload.
| Change | Effort | Expected gain |
|---|---|---|
| Enable XMP/EXPO in BIOS so RAM runs at rated speed | Low | Small to large — the default JEDEC profile can run memory hundreds of MT/s slower than rated |
| Switch to dual-channel (two sticks instead of one) | Low | Small to large — bandwidth doubles; latency-sensitive workloads benefit most |
| Set the Windows High Performance / Ultimate power plan | Very low | Negligible to small — reduces latency spikes from power-state transitions |
| Disable unnecessary startup apps and background services | Low | Negligible to small — fewer cache evictions and interrupts during play |
| Update BIOS and chipset drivers | Low | Negligible to small — AGESA and chipset updates frequently include memory compatibility and scheduling fixes |
| Turn off Memory Integrity (Core Isolation) after assessing the risk | Low | Small — virtualization-based security adds measurable memory access overhead |
| Enable Resizable BAR if your platform supports it | Medium | Workload-dependent — not a memory latency fix per se, but reduces one class of CPU-side transfer bottleneck |
Step-by-Step Tuning
Ordered roughly by impact. Each fix lists what causes the problem, how to check, what to do, and how to undo it.
1. Enable the correct memory profile (XMP or EXPO)
What causes it: Motherboards ship with conservative JEDEC defaults so any RAM sticks boot reliably. Without a profile enabled, a 6000 MT/s DDR5 kit can run at 4800 MT/s with looser timings than it was rated for.
How to check: Open Task Manager (Ctrl+Shift+Esc) → Performance → Memory and read the speed shown. Compare it to the rated speed printed on your RAM packaging. Or run wmic memorychip get speed, configuredclockspeed in a terminal.
What to do: Reboot into BIOS (usually Del or F2 during POST). On Intel boards look for XMP or XMP I; on AMD look for EXPO or A-XMP depending on vendor naming (ASUS, MSI, Gigabyte, ASRock all place it near the top-level OC or Tweaker page). Select Profile 1, save with F10, and reboot. If the system fails to train memory, clear CMOS (jumper or removing the coin cell for 30 seconds) and try the second profile if one exists.
How to undo: Return to BIOS and set the memory profile to Auto/Default.
2. Verify and fix dual-channel operation
What causes it: A single memory stick, or two sticks in the wrong motherboard slots, halves available bandwidth and worsens effective latency under load.
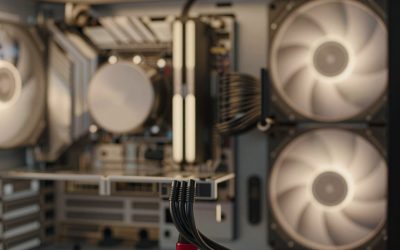
How to check: Task Manager → Performance → Memory shows “Slots used.” Then check physical seating against your motherboard manual — most consumer boards want sticks in slots A2 and B2 (the second and fourth from the CPU) for dual-channel. CPU-Z’s Memory tab showing “Channel: Dual” is the definitive confirmation.
What to do: Power down, unplug, and move sticks to the correct slots per the manual’s recommended configuration. If you have one stick, adding a matching second is the highest-impact hardware change in this entire guide.
How to undo: Move sticks back; no software state persists.
3. Reassess Memory Integrity (Core Isolation)
What causes it: Virtualization-based security (VBS) and its Memory Integrity (HVCI) feature run a hypervisor layer beneath Windows, and hardware-enforced code integrity checks add overhead to memory accesses. It’s on by default on many modern Windows 11 installs.
How to check: Settings → Privacy & Security → Windows Security → Device Security → Core Isolation details. “Memory integrity” shows On or Off. Also run msinfo32 and look for “Virtualization-based security” status.
What to do: If you accept the security trade-off — you lose protection against certain kernel-level exploit classes, and some anti-cheat systems actually require it — toggle Memory integrity Off and reboot. Check your games’ anti-cheat documentation first; a few titles refuse to run with it disabled.
How to undo: Return to the same toggle and switch it back On. Windows will re-enable the feature after a reboot, though in some cases you may also need to set the registry value HKLM\SYSTEM\CurrentControlSet\Control\DeviceGuard\Scenarios\HypervisorEnforcedCodeIntegrity → Enabled to 1.
4. Choose the right power plan and check core parking
What causes it: Balanced power plans aggressively idle cores and transition C-states/P-states. Waking a core adds latency to the first memory requests it issues — a classic cause of microstutter in CPU-bound games.
How to check: Control Panel → Hardware and Sound → Power Options, or run powercfg /getactivescheme. For core parking, run powercfg /qh and search for “Core Parking” values in the output.
What to do: Select High Performance. To expose the plan if it’s hidden, run powercfg -duplicatescheme e9a42b02-d5df-448d-aa66-28f43d9d4b73 (the hidden Ultimate Performance scheme), then pick it in Power Options. On hybrid-architecture Intel CPUs, also check your board vendor’s chipset driver package for a scheduler/power-management driver, and leave Intel Thread Director enabled — parking E-cores manually often hurts more than it helps there.
How to undo: Switch back to Balanced. On laptops this is strongly recommended; High Performance plans can cause thermal and battery problems on mobile hardware.
5. Trim startup programs and background services
What causes it: Launchers, updaters, RGB suites, and telemetry agents occupy physical pages, evict game data from caches, and generate timer interrupts that interrupt latency-sensitive loops.
How to check: Task Manager → Startup apps, sorted by Startup impact. For a deeper look, Task Manager → Details while a game runs; anything consuming consistent CPU or disk alongside your game is a candidate.
What to do: Disable what you don’t need at boot — right-click → Disable. For services, run services.msc and set clearly unnecessary third-party services to Manual rather than Disabled (Manual is safer; a dependent app can still start them). Be conservative with Microsoft services; use msconfig → Services → “Hide all Microsoft services” first to filter the list.
How to undo: Re-enable the startup entry or set the service back to Automatic. Nothing here is destructive.
6. Update BIOS and chipset drivers
What causes it: Memory controller behavior lives partly in CPU microcode (AGESA on AMD, ME firmware microcode on Intel). Vendors ship latency and stability fixes in BIOS updates, and Windows-side memory/scheduler behavior depends on current chipset drivers.
How to check: Run msinfo32 and compare the BIOS Version/Date against the latest listed on your motherboard’s support page. Chipset driver version appears in Apps > Installed apps (search “chipset”).
What to do: Download the latest BIOS from the board vendor’s support page and flash via the BIOS’s built-in EZ Flash / M-Flash / Q-Flash utility from a USB stick — never from within Windows unless the vendor’s tool explicitly supports it. Then install the current chipset package from AMD or Intel directly. Recheck XMP after a BIOS update; profiles occasionally reset.
How to undo: Flash a previous BIOS revision if a newer one causes issues; most vendor pages keep an archive.
7. Disable Windows transparency and unnecessary visual effects (marginal)
What causes it: Desktop composition effects consume GPU and some CPU cycles, occasionally adding frame-time noise on borderless-window games, especially on APUs where the iGPU shares memory bandwidth with the CPU.
How to check: If you game on an APU or a low-end discrete GPU in borderless mode, this applies. Otherwise skip it.
What to do: Settings → Personalization → Colors → toggle Transparency effects Off. For a deeper cut, run sysdm.cpl → Advanced → Performance Settings → Adjust for best performance, then selectively re-enable “Smooth edges of screen fonts.”
How to undo: Restore the toggles; effects return immediately.
8. Hardware-level memory tuning (advanced, BIOS-only)
What causes it: Even with XMP enabled, boards apply conservative secondary and tertiary timings. Tightening them, or adding a modest frequency bump, reduces true memory latency — but this is instability territory.
How to check: If you can’t explain what tRFC or a memory controller voltage does, this step isn’t for you, and that’s a legitimate stopping point.
What to do: In BIOS, tighten primary timings one step at a time, and on DDR5 reduce tRFC in increments, testing stability after each change with an extended memory test (TestMem5 or a long MemTest86 pass). Keep SoC/VDDQ voltages within your kit’s rated specifications and don’t exceed them on a whim. Expect days of validation for single-digit gains.
How to undo: Load the board’s default profile or clear CMOS. Always note every changed value before you change it.
Measure Before and After
Never trust a tweak you haven’t measured. Establish a baseline before touching anything:
- Frame times, not averages: Use CapFrameX or PresentMon to capture 1% and 0.1% lows across a repeatable in-game scene. Latency improvements show up almost entirely in the lows and in frame-time variance, not average FPS.
- Memory latency directly: Tools like AIDA64’s Cache & Memory Benchmark report read/write/copy latency. Run it three times before and after each change and compare medians — run-to-run noise is real.
- System responsiveness: For end-to-end latency, an in-game latency readout or a tool like NVIDIA Frame View gives a fuller picture than FPS alone.
- Isolate variables: Change one thing, reboot, test, record. If you change three things at once and frames drop, you won’t know which to revert.
- Control conditions: Same background apps, same power state, comparable room temperature, and no browser tabs chewing cycles during captures.
What Not to Do
- Don’t use “RAM cleaner” or “memory optimizer” utilities. Forcing pages out of the standby list makes Windows refetch them from disk later — that’s slower, not faster. Windows memory management is better than these tools.
- Don’t disable the pagefile entirely. Some games and applications require commit headroom; a pagefile set to system-managed costs you nothing when unused.
- Don’t copy another system’s BIOS values. A timing that’s stable on one memory controller can hard-crash yours. Randomized settings from forum posts are a corrupt-profile generator.
- Don’t chase registry “latency fixes” from YouTube thumbnails. Most deprecated system-critical values or reuse long-obsolete tweaks. Some genuinely break scheduling.
- Don’t disable virtualization globally to kill VBS overhead if you use WSL2, Android subsystems, or VMs. Those depend on the hypervisor.
- Don’t disable Spectre/Meltdown mitigations casually. The performance delta on modern CPUs is small, and the security exposure is real, especially for anything with a browser open.
FAQ
Will faster RAM lower memory latency more than tighter timings?
Frequency and timings trade off against each other, and the winner depends on the platform. On current AMD Ryzen systems, the memory controller’s甜spot — a mid-range DDR5 speed with tightened timings — often beats maximum-frequency kits with loose timings once the interconnect topology is factored in. On Intel, higher frequency generally scales well. The honest answer: test both configurations if your kit allows profile switching, and let your own frame-time captures decide.
Does more RAM reduce latency?
Capacity and latency are mostly independent. Adding RAM reduces latency only indirectly: with enough capacity, Windows keeps more of your working set in physical memory instead of paging to disk, and disk access is orders of magnitude slower than any RAM access. If your current usage sits below total capacity, more RAM does nothing for latency.
Is disabling Memory Integrity safe?
It’s a trade-off, not a bug. You give up a layer of protection against certain kernel exploits in exchange for removing hypervisor overhead. If you keep your system updated, avoid sketchy software, and your games’ anti-cheat doesn’t require it, disabling is a defensible choice. If you handle sensitive data or want maximum hardening, leave it on — the performance cost is real but modest on current hardware.
How often should I re-tune memory settings?
After major platform changes: a BIOS update, a new CPU, a new memory kit, or a Windows feature update that alters virtualization-based security defaults. Otherwise, a stable configuration doesn’t drift. Re-run your benchmark baseline every few months to catch degradation from driver updates or background creep, but don’t expect settings to silently become worse.