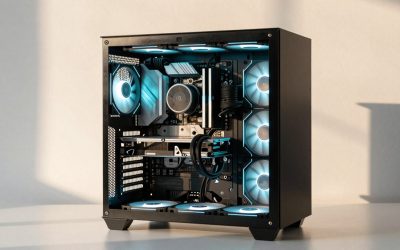
To install a CPU cooler, confirm it supports your socket, clear any protective film, add a small amount of thermal paste unless it is pre-applied, mount the backplate or brackets, lower the cooler straight onto the processor, tighten the screws evenly in a cross pattern, then plug the fan or pump cable into the CPU fan header. The whole job takes roughly 15 to 30 minutes on a bare motherboard. Care in the preparation and the tightening is what separates a quiet cool system from a hot one.
This guide explains what to check first, how air coolers and liquid coolers differ at the mounting stage, the steps in order, and how to confirm the result. It reflects general practice drawn from manufacturer manuals, published specifications and buyer reports. Your cooler’s instruction sheet always overrides general advice.
Direct answer and what you need
You need the cooler with all its mounting parts, a Phillips screwdriver (often a magnetized one with a long shaft), thermal paste if the cooler does not come with pre-applied compound, isopropyl alcohol with lint-free wipes or coffee filters for cleaning, and a clean flat surface. Work on the motherboard box or an anti-static-safe surface, and touch bare metal on the case before handling components to discharge static.
| Item | Why it matters |
|---|---|
| Socket-specific brackets or backplate | Every socket family uses different hole spacing; a wrong bracket will not seat flat |
| Thermal paste (if needed) | Fills microscopic gaps between the heat spreader and cooler base |
| Screwdriver, magnetic tip | Small screws are easy to drop onto the board |
| Alcohol and lint-free wipes | Removes old paste or fingerprints |
| Motherboard and case manuals | Show the CPU fan header locations and cooler clearance limits |
Preparation and pre-installation checks
Spend a few minutes confirming fit before you open any packaging, because returning a cooler that does not fit is easier before it is mounted.
- Socket support. Compare the socket on your motherboard with the compatibility list on the cooler’s specification page. Intel and AMD sockets are not interchangeable, and some coolers need a different bracket for newer sockets. If you are unsure which socket your board uses, our guide to Ryzen AM4 and AM5 socket compatibility explains how generations map to boards.
- Cooler height. Tower coolers have a maximum height the case can accept. Compare the cooler’s listed height with the case’s stated CPU cooler clearance, leaving a few millimeters spare.
- RAM clearance. Large coolers can overhang the memory slots. Check whether tall RAM modules fit under the fan, or whether you must raise the fan up.
- Radiator space. For liquid coolers, check which radiator sizes the case supports at front, top or rear and whether tubing reaches the CPU block.
- Power. Identify the CPU fan header and, for a pump, the pump or AIO header or a separate power connector. Look at the board manual to find them.
- Contact surface. Remove any protective film from the base. Wipe the processor and the cooler base with alcohol if either has fingerprints or old paste.
Air cooler vs liquid cooler: what changes
The principle is the same, but the mounting sequence differs. A tower air cooler is one heavy piece with a fan or two attached. An all-in-one liquid cooler splits into a CPU block, tubes and a radiator mounted elsewhere in the case.
| Factor | Tower air cooler | All-in-one liquid cooler |
|---|---|---|
| Mounting hardware | Backplate and brackets on the board, large heatsink on top | Backplate and bracket for the block, separate radiator fixings in the case |
| Order of work | Often fits before the board goes in the case, fans last | Usually radiator first, then the block once the board is in |
| Main clearance risks | Height, RAM overhang, top VRM heatsinks | Radiator size, tube length, pump placement |
| Cables | One or two fan cables to the CPU fan header | Pump cable, fan cables, sometimes USB for lighting or software |
| Typical error | Forgetting the film, mounting a fan backwards | Kinking tubes, placing the radiator so that the pump sits at the highest point |
| Maintenance | Dust cleaning | Dust cleaning plus pump and tubing checks over time |
If you are shopping for something that matches a white or themed build, our roundup of white CPU coolers lists options. Whatever you pick, read the manual for your specific model, because mounting hardware varies even within a brand.
Step-by-step installation
- Install the processor first. If the CPU is not already seated, lift the socket lever, drop the chip in with the corner marker aligned, and close the lever. Do not force it. Skip this step if it is already installed.
- Prepare the backplate or brackets. Fit the correct spacer or bracket set for your socket as the cooler’s manual specifies. On some boards, a backplate goes behind the motherboard and you will need to line up its pegs with the holes.
- Apply thermal paste. If paste is not pre-applied, place a pea-sized dot in the center of the processor’s metal lid. Avoid spreading it by hand.
- Lower the cooler vertically. Line up the screw holes and lower straight down. Sliding or twisting spreads the paste unevenly and can leave gaps.
- Start all screws before tightening. Thread each by hand a few turns first. Then tighten in a diagonal pattern, a half-turn at a time, until the screws stop or the spring hardware bottoms out.
- Attach the fan or fans. On air coolers that use clips, position the fan for correct airflow direction and clip it securely. Check the clearance against RAM.
- Connect the cables. Plug the fan into the CPU fan header. For an AIO, plug the pump into the pump or AIO header or the connector the manual specifies, and the radiator fans into the fan headers.
- Check the cooler for wobble. Gently try to move it. It should feel firmly attached. If it rocks, loosen and re-tighten in sequence.
With a liquid cooler, mount the radiator in the case before fitting the CPU block when the case manual suggests that order. Keep the tubes free of sharp bends, and place the radiator so that the pump is not at the highest point of the loop where possible, as the manufacturer advises.
Worked example: how much paste is a pea?
As a rough planning guide, assume a standard desktop processor lid of around 35 to 40 mm on a side, a figure that varies by platform and is only an illustration. A dot of about 3 to 4 mm across typically spreads under mounting pressure to cover most of the surface. If you apply a larger blob around 8 mm, expect paste to ooze past the edges onto the socket area. After a first mount, you can lift the cooler to inspect the spread: a thin layer covering the lid evenly with a bit of margin is good. If the spread is patchy, clean both surfaces and try again with a slightly larger dot.
Diagnostic checklist after installation
Before closing the case, confirm each of these.
- The cooler does not move when pressed gently, and all mounting screws are snug.
- The protective film is gone from the cooler base.
- The fan spins freely and nothing, including cables, touches the blades.
- The fan or pump cable is plugged into the correct header.
- RAM and PCIe cards have clearance and are fully seated.
- The BIOS shows a nonzero CPU fan or pump RPM at startup.
- Idle CPU temperature is reasonable after a few minutes. A hardware monitor or the BIOS hardware page shows the reading; compare it with the cooler maker’s expectations.
If the system complains about a missing fan at startup, the cable is probably in the wrong header or loose. If the idle temperature is very high and the fans are quiet, power off and check the mount before running anything heavy.
When to stop and get help
Stop and consult the manufacturer or a technician if the processor pins look bent on a socket type that uses pins, if a liquid cooler leaks, makes grinding noises or shows no pump movement, if the cooler will not seat flat despite the right parts, or if you are not comfortable working near an expensive, already-installed processor. Never run a CPU without a cooler attached, and follow the manual for your model.
Related guides
- Replacement Cables For Gaming Mice And Headsets
- Nvidia Control Panel Best Settings For Gaming
- How To Test Gpu Stability After Overclocking
Frequently asked questions
How much thermal paste should I use?
Follow the cooler maker’s guidance first. As a general rule, a pea-sized dot or a small line in the center of the processor’s heat spreader is enough, because mounting pressure spreads it out. Too much can squeeze out the sides and make a mess, while too little leaves gaps. If the cooler ships with pre-applied paste, do not add more on top.
Which way should the cooler fan blow?
Aim the airflow in the same direction as your case airflow, which usually means pulling air from the front toward the rear exhaust. On a tower cooler that typically puts the fan on the front side blowing back through the fins. A top-mounted radiator may exhaust, while a front-mounted one may intake. The case manual often suggests a preferred layout.
Do I need to remove the plastic film from the cooler base?
Yes, if there is one. Many coolers ship with a protective sticker or film over the contact plate, and leaving it on blocks heat transfer badly. Look closely at the bottom of the cooler before mounting. Pre-applied paste is different and is meant to stay, so only peel off the protective layer that covers it, not the paste itself.
Should I install the cooler before or after putting the motherboard in the case?
For many builds it is easier to install the CPU, RAM and cooler while the motherboard sits on its box outside the case. That gives clear access to the socket and backplate. A large tower cooler or a radiator can block other steps, so plan the order, and make sure a case with no rear access panel still lets you tighten the mounting hardware.
How tight should the cooler screws be?
Snug and even, not forced. Tighten in a diagonal or cross pattern a little at a time, and stop when the screws stop or the spring-loaded hardware bottoms out as the instructions describe. Overtightening can bend the board or crack the processor package, and uneven pressure leaves a gap that raises temperatures. Use the manufacturer’s torque or turn guidance if it is given.
Related guides
- How to Screenshot on a Chromebook: Keyboard Shortcuts, Screen Capture Tool and Tablet Buttons
- Best Gaming PC Financing Options and What to Check First: 4 Compared (2026)
- Best Websites to Buy a Gaming PC, Compared by Return Policy: 4 Compared (2026)
- Best Specs for a Gaming PC by Resolution and Use: 4 Compared (2026)