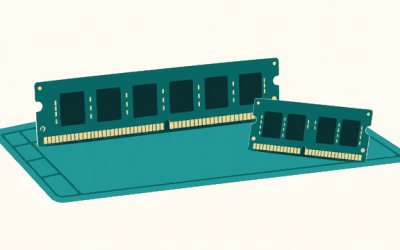
Opening the HP Victus 15 or 16 to add RAM means removing 10 to 12 Phillips screws on most 2023-2026 revisions, popping a clip-secured bottom panel, and clearing a heatpipe that sits close enough to the SO-DIMM slots to make insertion angle matter. This guide covers the exact screw layout, where the panel clips hide, how much room you actually have to work with, and the BIOS/XMP and memtest steps to confirm the new kit is stable once it’s back together.
What You’re Working With
Victus 15 (fh0xxx/fb0xxx series) and Victus 16 (d0xxx/e0xxx/r0xxx series) share a similar bottom-panel design across most 2023-2026 configurations: a single large plastic panel held by a screw ring plus internal plastic clips along the seams. Both lines typically ship with two SO-DIMM slots, and depending on configuration, either both are populated or one is left open with a single stick installed. Check your exact model’s manual or the sticker on the bottom panel before ordering, since RAM channel configuration affects performance more than most buyers realize.
| Component | Victus 15 | Victus 16 |
|---|---|---|
| Bottom panel screws | 10-11 (mixed lengths) | 11-12 (mixed lengths) |
| SO-DIMM slots | 2 (DDR4 or DDR5, model-dependent) | 2 (DDR4 or DDR5, model-dependent) |
| Heatpipe clearance above slots | ~4-5 mm | ~5-6 mm |
| Typical max supported RAM | 32-64 GB (2×16 or 2×32) | 32-64 GB (2×16 or 2×32) |
| Panel clip count | 6-8 hidden clips | 8-10 hidden clips |
Step 1: Confirm RAM Type Before You Buy Anything
HP has sold both DDR4 and DDR5 configurations of Victus 15/16 depending on the CPU/GPU pairing and manufacture date. Mixing types isn’t possible, the slot keying is physically different. Run a quick check first:
- Open Task Manager (Windows) > Performance > Memory, and look at the “Speed” and slot usage listed at the bottom.
- Or use CPU-Z’s Memory and SPD tabs, which will explicitly state DDR4 vs DDR5 and the current module part numbers.
Buying the wrong generation is the single most common return reason for laptop RAM upgrades, so confirm this before ordering a kit.
Step 2: Gather Tools and Prep
- Phillips #0 or #1 screwdriver (magnetic tip helps a lot here since screws are small and easy to drop)
- A thin plastic pry tool or old credit card for the clips (don’t use metal, it can gouge the plastic seam or scratch the chassis)
- Anti-static wrist strap or at minimum, touch a grounded metal object before handling the modules
- Fully power off the laptop, unplug the charger, and hold the power button for 10 seconds to discharge residual capacitance
Step 3: Remove the Bottom Panel
Flip the laptop over. The screw ring runs around the perimeter, but a few screws are typically longer and sit near the hinge area (these secure into thicker chassis ribbing) while the majority around the sides and front edge are shorter. Mixing them up on reassembly can strip threads or leave the panel slightly proud in spots, so keep them separated by position as you remove them, laid out on a sheet of paper roughly matching their location.
| Screw location | Typical count | Approx. length |
|---|---|---|
| Rear/hinge edge | 2-3 | 6-7 mm |
| Side edges | 4-5 | 4-5 mm |
| Front edge | 3-4 | 4-5 mm |
Once every screw is out, don’t try to lift the panel straight up. It’s held by plastic clips along the seam, concentrated most densely along the front edge and around the vent cutouts near the hinge. Start prying gently at a corner near the front edge, work the pry tool along the seam in short sections, and let each clip pop before moving to the next. Forcing a wide gap in one spot tends to crack the clip tabs rather than release them cleanly.
Step 4: Locate the SO-DIMM Slots and Check Heatpipe Clearance
The RAM slots sit just below the keyboard deck, usually near the center-left of the board, adjacent to the WiFi card and sometimes partially under a small EMI shield. The heatpipe assembly for the CPU/GPU runs close by, and on both the 15 and 16, there’s roughly 4 to 6 mm of vertical clearance between the heatpipe and the top of an installed SO-DIMM module. That’s enough room to insert a module at the correct 20-25 degree angle, but not enough to be careless about it.
- Insert the module at an angle, aligned with the slot’s notch, before pressing down flat to seat it.
- If a module seems to catch on the heatpipe, you’re inserting it too flat too early. Increase the angle rather than forcing it.
- Press down evenly on both edges of the module until the side clips snap over the notches. You should feel and hear a distinct click on each side.
Step 5: Reassemble
Reverse the process: seat the panel starting from the clips first (press along the seam until each clip audibly seats), then replace screws in their original positions using the length groupings from the table above. Don’t fully tighten any single screw first, snug them all loosely, then go back and tighten evenly to avoid warping the thin plastic panel.
Step 6: BIOS Recognition and XMP/EXPO Setup
Power on and enter BIOS (usually Esc then F10 on HP laptops, or hold Esc during boot). Confirm the new total capacity shows correctly under System Information. Most Victus BIOS revisions run RAM at JEDEC default speeds out of the box rather than the kit’s rated XMP/EXPO speed, so:
- Go to Advanced > Memory or a similarly named submenu (naming varies by BIOS revision).
- Look for “XMP Profile” (Intel platforms) or “EXPO” (AMD platforms) and enable Profile 1.
- Save and exit (F10), then let the system reboot fully once before checking speed again in CPU-Z or Task Manager.
If the laptop fails to boot after enabling XMP/EXPO, that usually means the kit’s rated speed exceeds what the specific Victus memory controller and BIOS combination validates. Clear CMOS (there’s typically a small reset via battery disconnect or a BIOS recovery key combo, check your model’s manual), boot at default JEDEC speed, and try a lower XMP profile if the kit offers one, or accept default speed if not.
Step 7: Run Memtest to Confirm Stability
Capacity showing correctly in Windows doesn’t confirm the modules are actually stable at the speed you set. Run a memory test before trusting the upgrade:
- Download MemTest86 (the free version is sufficient) and create a bootable USB drive using its built-in tool.
- Boot from that USB (may require temporarily disabling Secure Boot in BIOS).
- Let it run at least one full pass, which typically takes 30-90 minutes depending on installed capacity.
- Zero errors after a full pass means the kit is stable at the current speed. Any errors mean dropping back one XMP/EXPO speed step or reverting to JEDEC default and retesting.
Worked Example: Is the Upgrade Worth It for Your Workload
A common upgrade path is going from a single 8 GB DDR5 stick (single-channel) to 2×16 GB (dual-channel, 32 GB total). The capacity gain matters for multitasking and modern game memory footprints, but the dual-channel switch itself often delivers a measurable frame rate gain in games that are memory-bandwidth sensitive, commonly in the range of 5-15% depending on the integrated or discrete GPU and title, because single-channel configurations effectively halve available memory bandwidth. If your Victus currently runs one stick, moving to a matched dual-channel kit is usually worth more in practice than moving from 16 GB to 32 GB while staying single-channel.
Quick Decision Matrix
| Current setup | Recommended upgrade | Primary benefit |
|---|---|---|
| 1×8 GB single-channel | 2×16 GB dual-channel kit | Bandwidth + capacity gain |
| 2×8 GB dual-channel | 2×16 GB or 2×32 GB dual-channel kit | Capacity gain, bandwidth already fine |
| 1×16 GB single-channel | Add matching 16 GB or replace with 2×16/2×32 kit | Bandwidth gain, keep or grow capacity |
Always buy a matched dual-channel kit rather than mixing an old stick with a new one of different speed or timings. Mismatched kits will run at the slower module’s speed and timings at best, and can cause instability at worst.