
An NVMe SSD can run warm during game installs, video exports, large file transfers, and Windows updates. That is normal. What is not normal is ignoring sustained high temperatures, because heat can trigger thermal throttling: the drive deliberately slows down to protect itself. In more serious cases, repeated overheating can contribute to instability, file-transfer errors, unexpected restarts, or reduced long-term drive health.
Fortunately, checking NVMe SSD temperature in Windows is usually quick. Windows may show the reading directly for supported drives, and free hardware-monitoring utilities can provide a second opinion when it does not. The goal is not to chase the lowest possible number; it is to confirm that the drive stays within its manufacturer’s specified operating range during everyday use.
As an Amazon Associate we earn from qualifying purchases at no extra cost to you. Product prices and availability are accurate as of the date shown and are subject to change.

What You Need
| Item | Why | Optional? |
|---|---|---|
| Windows 10 or Windows 11 PC | Lets you check supported NVMe drive temperatures through built-in storage tools. | No |
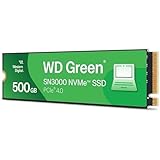
| Installed NVMe SSD | Most desktop NVMe drives use the M.2 2280 size, measuring 22 mm wide by 80 mm long. | No |
| Administrator account | May be needed to install or run detailed hardware-monitoring software. | Usually |
| Hardware-monitoring utility | Useful if Windows does not display a temperature or if you want to see controller and NAND sensor readings. | Yes |
| M.2 heatsink or motherboard M.2 cover | Helps spread heat away from an internal drive, especially in compact PCs or under heavy workloads. | Yes |
| External NVMe enclosure | Needed only for an NVMe drive used externally. A 10 Gbps enclosure, such as the $17.99 UGREEN USB-C M.2 NVMe SSD Enclosure, can be useful, though some USB bridges do not pass temperature data to Windows. | Yes |
Step-by-Step
1. Identify the NVMe drive you want to monitor (2 minutes)
Start by confirming which drive is installed. Right-click the Start button and select Device Manager. Expand Disk drives and look for the SSD’s model name. NVMe models commonly include terms such as “NVMe,” “PCIe,” “M.2,” or a brand and model number.
This matters if your computer has more than one drive. A desktop might contain a fast NVMe boot drive plus a larger SATA SSD or hard drive for files. You want temperature information for the specific NVMe SSD that handles Windows, games, creative projects, or other demanding work.
2. Check the temperature in Windows Settings first (1 minute)
Open Settings, then go to System and Storage. Select Advanced storage settings, then choose Disks & volumes. Find the NVMe drive and select Properties.
On compatible systems and drives, Windows displays a temperature reading in this area. You may also see drive health information, including estimated remaining life, available spare capacity, and warnings from the drive’s self-monitoring system.
If the temperature is listed, record it while the PC is sitting idle for five to 10 minutes. Then check it again after a normal demanding task, such as transferring a 20 GB folder, loading a large game, or exporting a video. This provides a more useful picture than one reading taken at random.
3. Use Task Manager as a quick cross-check (1 minute)
Press Ctrl + Shift + Esc to open Task Manager. Select the Performance tab, then choose the disk listed as an SSD. Some Windows installations show the drive’s temperature near its activity, capacity, and response-time details.
Task Manager is convenient for a quick check while you work, but it does not show every sensor on every SSD. If the temperature field is missing, it does not necessarily mean there is a problem. It often means Windows or the drive firmware does not expose that sensor in Task Manager.
4. Use a hardware-monitoring utility if Windows shows no reading (5 to 10 minutes)
Install a reputable Windows hardware-monitoring utility that can read SMART and NVMe sensor data. Look for an entry matching your SSD model. Depending on the drive and utility, you may see labels such as Composite Temperature, Drive Temperature, Controller Temperature, or Temperature Sensor 1.
For everyday decisions, use the composite or main drive temperature when available. Controller temperatures can be higher than the overall drive reading because the controller handles communication and workload management. A brief controller spike is less concerning than a composite temperature that remains elevated for 15 to 30 minutes.
Check the utility’s drive-health page as well. Critical warnings, media errors, or a “caution” status deserve attention even if the current temperature looks acceptable.
5. Test the temperature under a realistic workload (10 to 20 minutes)
Leave the monitoring window open, then perform an activity that represents how you actually use the computer. Copying a few photos will not reveal much. Better examples include moving a 25 GB to 50 GB video folder, installing a game, decompressing a large archive, or editing high-resolution media.
Most consumer NVMe SSDs are designed to operate up to approximately 70°C, but always treat the manufacturer’s specification for your exact model as the final authority. A drive that reaches the 50°C to 65°C range during a demanding transfer may be operating normally. A drive repeatedly approaching or exceeding its specified maximum, especially while the room is not unusually hot, needs better cooling or further investigation.
6. Improve cooling if the drive runs too hot (15 to 45 minutes)
Shut down the computer fully before touching internal parts. For a desktop, remove the side panel and locate the M.2 drive. If the motherboard has an M.2 heatsink, make sure it is correctly installed and that its thermal pad still has its protective plastic film removed. The pad should touch the top of the SSD without bending the drive.
Also check airflow. Front intake fans should bring in cool air, while rear or top fans exhaust warm air. Dust buildup, loose cables, and a graphics card positioned directly over the M.2 slot can trap heat around the SSD. In a laptop, avoid long high-load sessions on blankets, cushions, or thick carpeting that block bottom vents.
For an external drive, place the enclosure on a hard surface with open air around it. Do not stack it on a warm router, game console, or laptop power brick. USB-C NVMe enclosures can become warm during sustained transfers, and not all of them report internal SSD temperature accurately through the USB connection.
Mistakes to Avoid
- Judging the drive by an idle reading alone. An SSD at 35°C while idle can still overheat during a 40 GB transfer.
- Comparing every sensor as though it has the same limit. A controller sensor may read hotter than the composite drive temperature.
- Removing an existing heatsink without a reason. Motherboard M.2 covers often include thermal pads and can be useful cooling hardware, not just decoration.
- Using a heatsink with plastic film left on the thermal pad. This blocks heat transfer and is an easy installation mistake.
- Ignoring sudden performance drops. If transfer speeds fall sharply after a few minutes and temperatures are high, thermal throttling may be the cause.
- Assuming every external enclosure passes SMART data. A missing temperature reading over USB may be a bridge-chip limitation rather than an SSD failure.
How Often
Check your NVMe SSD temperature once after installing a new drive, after adding a heatsink, or after changing case fans. Check again after a major workload change, such as beginning 4K video editing, installing several large games, or using the drive in a new external enclosure.
For most home computers, a quick check every three to six months is enough. Check monthly if the PC sits in a hot room, has a small-form-factor case, runs long game sessions, or frequently transfers large files. In 2026, many modern motherboards include M.2 heatsinks, but they still depend on good overall case airflow.
When to Call a Pro or Replace
Seek professional help if the SSD repeatedly reaches or exceeds its published temperature limit after you confirm the heatsink, thermal pad, and airflow are correct. Also get help if Windows freezes, the drive disappears from File Explorer or BIOS, file copies fail, or monitoring software reports critical SMART warnings.
Replace the drive when it shows persistent health warnings, recurring data errors, or unreliable detection after testing in another compatible system. Back up important files immediately before troubleshooting further. For a typical M.2 2280 replacement, verify the slot supports NVMe PCIe drives rather than SATA-only M.2 drives. Capacity, endurance rating, warranty length, and cooling compatibility matter more than headline speed alone.
FAQ
What is a normal NVMe SSD temperature?
Idle temperatures commonly fall around 30°C to 50°C, while heavier workloads can push many drives into the 50°C to 65°C range. Exact normal temperatures vary with room temperature, case airflow, drive model, and workload. Follow the operating-temperature specification for your specific SSD.
Is 70°C too hot for an NVMe SSD?
For many consumer NVMe drives, 70°C is near the upper end of the normal specified operating range. It is not an ideal sustained temperature, and some drives begin throttling before or around that point. If your drive remains near 70°C during ordinary use, improve cooling and verify its model-specific limit.
Why does Windows not show my NVMe SSD temperature?
Windows temperature reporting depends on the SSD firmware, storage driver, Windows version, and connection type. External USB enclosures may also block SMART temperature information. Use a hardware-monitoring utility to check whether the drive exposes its sensors another way.
Can an M.2 heatsink damage an SSD?
A correctly fitted heatsink should not damage an SSD. Use a properly sized thermal pad, avoid forcing the drive downward, and make sure no protective film remains on the pad. The heatsink should fit the 22 mm-wide M.2 module and leave clearance for nearby graphics cards, cables, and motherboard components.
